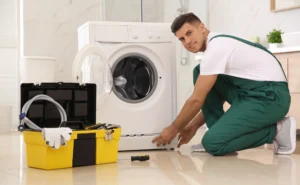
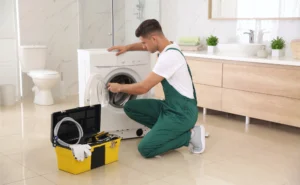
Fixing Your Washing Machine: A DIY Guide to Repairing the Water Inlet Valve
Washing machines are a modern convenience that we often take for granted—until they malfunction. One common issue many homeowners face is a faulty water inlet valve. In this guide, we’ll explore how to tackle this problem step by step, ensuring a smooth and effective repair process. At AZ Repairing Dubai, we understand the importance of a properly functioning washing machine, and we’re here to help you get it back on track.
Signs of a Faulty Water Inlet Valve
Before diving into the repair process, it’s crucial to identify the signs of a malfunctioning water inlet valve. If you notice low water flow, no water entering the machine, or unusual noises during the wash cycle, there’s a good chance the water inlet valve is the culprit. Recognizing these indicators early can save you time and prevent further damage to your machine.
Tools and Materials
To embark on this DIY journey, gather the necessary tools and replacement parts. A wrench, screwdriver, and a new water inlet valve are essential items. Additionally, don’t forget safety gear like gloves and safety glasses to protect yourself during the repair process.
Safety Precautions
Safety should always be a priority when working with appliances. Before starting the repair, ensure you disconnect the power and water supply to the washing machine. Follow our tips for safely handling washing machine components to avoid accidents and injuries.
Locating the Water Inlet Valve
Understanding the anatomy of your washing machine is crucial for a successful repair. Familiarize yourself with the machine’s layout and identify the position of the water inlet valve. This knowledge will make the repair process much more straightforward.
Diagnosing the Issue
Before replacing the water inlet valve, perform some diagnostic tests. Check the valve for functionality and troubleshoot common problems. This step will help you confirm that the water inlet valve is indeed the issue and guide you in addressing any additional issues.
Step-by-Step Repair Process
Now that you’ve diagnosed the problem, it’s time to start the repair. Begin by shutting off the water supply to the washing machine repair. Carefully disconnect and remove the faulty water inlet valve, making way for the new one. Follow our detailed instructions for installing the replacement valve, ensuring a secure and proper fit.
Testing the Repaired Valve
With the new water inlet valve in place, reconnect the power and water supply to your washing machine. Run a test cycle to check if the valve is functioning correctly. This step is crucial for ensuring that your repair efforts have been successful and that your washing machine is back in working order.
Maintenance Tips
To prevent future issues, incorporate regular checks and maintenance into your routine. Learn how to clean and care for the water inlet valve, keeping it in optimal condition. These simple steps can extend the life of your washing machine and save you from future repair headaches.
Expert Tips from AZ Repairing Dubai
For additional insights and professional recommendations, turn to the experts at AZ Repairing Dubai. We’re here to answer your questions and provide the support you need for all your appliance repair needs. If you encounter challenges during the DIY process or prefer professional assistance, don’t hesitate to reach out to us.
Embark on your washing machine repair journey with confidence, armed with the knowledge and guidance provided in this comprehensive DIY guide. AZ Repairing Dubai is your trusted partner in maintaining and repairing household appliances, ensuring they serve you for years to come.


